Identifying the Problem
You may encounter an issue where your website loads an error instead of your site content, or sometimes even just a blank screen. If the error (on the site itself or in the error_log) points to a plugin or theme, this will need to be disabled and you should be able to access WordPress again. This guide walks you through how to find the error_log file and how to disable a plugin/theme through the file manager.
If the error involves a file outside of the wp-content folder (such as within the wp-admin folder, wp-includes folder, or main installation files), then this is most likely a sign that the WordPress core files need to be replaced.
Here is an example of a core files error:
Parse error: syntax error, unexpected 'public' (T_PUBLIC) in /home/katietem/public_html/wp-includes/Requests/Cookie.php on line 119
Fixing the specific problem described may fix that error, but oftentimes a new error pops up in its place. So, that is why it is best to go ahead and replace all the core files.
Check Your Current Version of WordPress
Before getting a clean copy of the WordPress files, you will need to know what version of WordPress your site is running.
Go to your application in Installatron > cPanel > My Apps, and you will see the version number below the links to access your site.
Download the WordPress Files
Download a new copy of WordPress WordPress.org. The latest version will be here on their download page, while all past versions will be located here.
Upload Files Using the File Manager
1. Locate Your Site's WordPress Files
To upload the new WordPress files using the File Manager, you will first need to access the File Manager in cPanel by going to cPanel > Files > File Manager.
In File Manager you can see all of the files for your site(s).
If the site you are updating is the one using your top-level domain, like mysite.com, then the WordPress files for your site will be in the public_html folder.
You will want to click on "public_html" in the left-hand sidebar menu to open that folder and view the files.
If the site is in a subdirectory, like mysite.com/wordpress, then the files for the site will be inside their own folder within the public_html folder. You would first open the public_html folder and then click on the folder for the subdirectory to see the Wordpress files.
If the site is on a subdomain like wordpress.mysite.com, or if it is using its own domain like anothersite.com, then it will have its own folder and you would open that folder to view the WordPress files.
2. Preparing To Upload New WordPress Files
Once you have located the WordPress files in your File Manager, you will want to find the Wordpress zip file that you downloaded to your computer.
*See the "Check Your Current Version of WordPress" and "Download the WordPress Files" section above if you have not downloaded a new copy of WordPress yet.
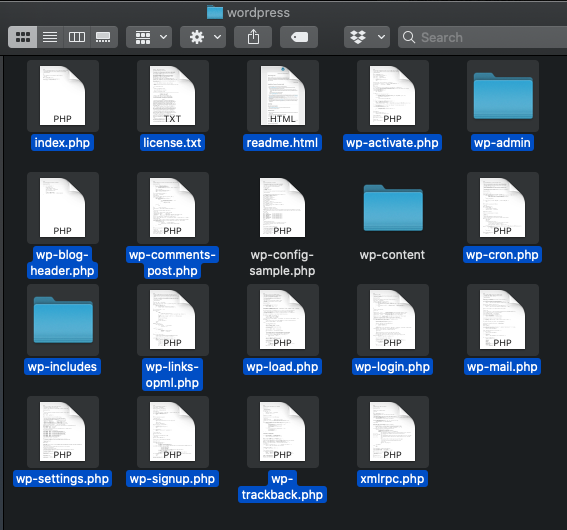
Double click the zip file to expand it, and then open the WordPress folder once it is ready. There you will see all of the Wordpress files that we will use replace the ones on your site.
The next step it to select all of the files in that folder - except for the wp-content folder - and compress those.
*We do not want to select the wp-content folder because that will overwrite all of the content currently on your site when it is uploaded.
Once you compress the files, you will see a new .zip file in the folder:
3. Uploading New WordPress CoreFiles
Now that we have the core files compressed into a .zip file, we can upload them to our site in the File Manager.
To do so, go back to your browser and verify that you are in the correct File Manager folder. Then click the Upload button in the top menu.
On the Upload page, drag and drop your zip file from your desktop into the upload field.
Once the progress bar turns green, click the "Go Back to..." link underneath it to go back to your folder.
Once back in your site's folder, you will see the uploaded zip file in your file list.
Click on the file and then click the Extract option in the top menu.
When the files are extracted from the zip file, they will replace the current WordPress files and you will have replaced the core files for your WordPress site.
You will see the extraction results window once the process is done and can close that.
After the replacement, the Last Modified dates for the individual php files will remain the same, but you should notice that the Last Modified dates for the wp-admin and wp-includes folders have updated to the time the file replacements were made.
Upload Files Using FTP
If you are new to FTP, here is a guide all about what it is and how to use it.
Open an SFTP connection to your account using an FTP client and navigate to the folder of the WordPress installation. For this example, I will be using CyberDuck.
Extract the files from the compressed file. Select everything except the wp-content folder and the wp-config.php file (usually wp-config is not included anyways, just wp-config-sample.php, but I leave that out as well just to be sure) and move it over to the folder open in your FTP client.
The wp-content folder is where all content including themes, plugins, and uploads are stored and the wp-config.php file has your specific database credentials stored, so you don’t want to replace these.
When uploading, you will most likely get a warning that files with those same names already exist. Double-check here that the wp-config.php file and wp-content folder are not included here and continue with the overwrite.

Once that finishes uploading, your core files have been replaced!