Mailgun is a popular email relay service to help ensure your emails are delivered to your recipients. In this article we will explain how to configure Mailgun and the Mailgun WordPress plugin to help improve email deliverability.
Sign up for Mailgun Account
The first step to configuring Mailgun is to sign up for an account. Mailgun is free for the first 10,000 emails every month, making it a great cost-friendly option for websites that don’t send a massive amount of email.

After signing up you will be prompted to verify your account via email and text message. When your account is verified, you will be able to add your domain to Mailgun.
Add a domain
In this step you will need to choose a domain (or subdomain, preferably) for sending mail through your website. In my example I chose the “mail” subdomain of my own domain (mail.areallycoolwebsite.club). Mailgun will then guide you in what records to add to your Domain Zone Editor to successfully configure email.
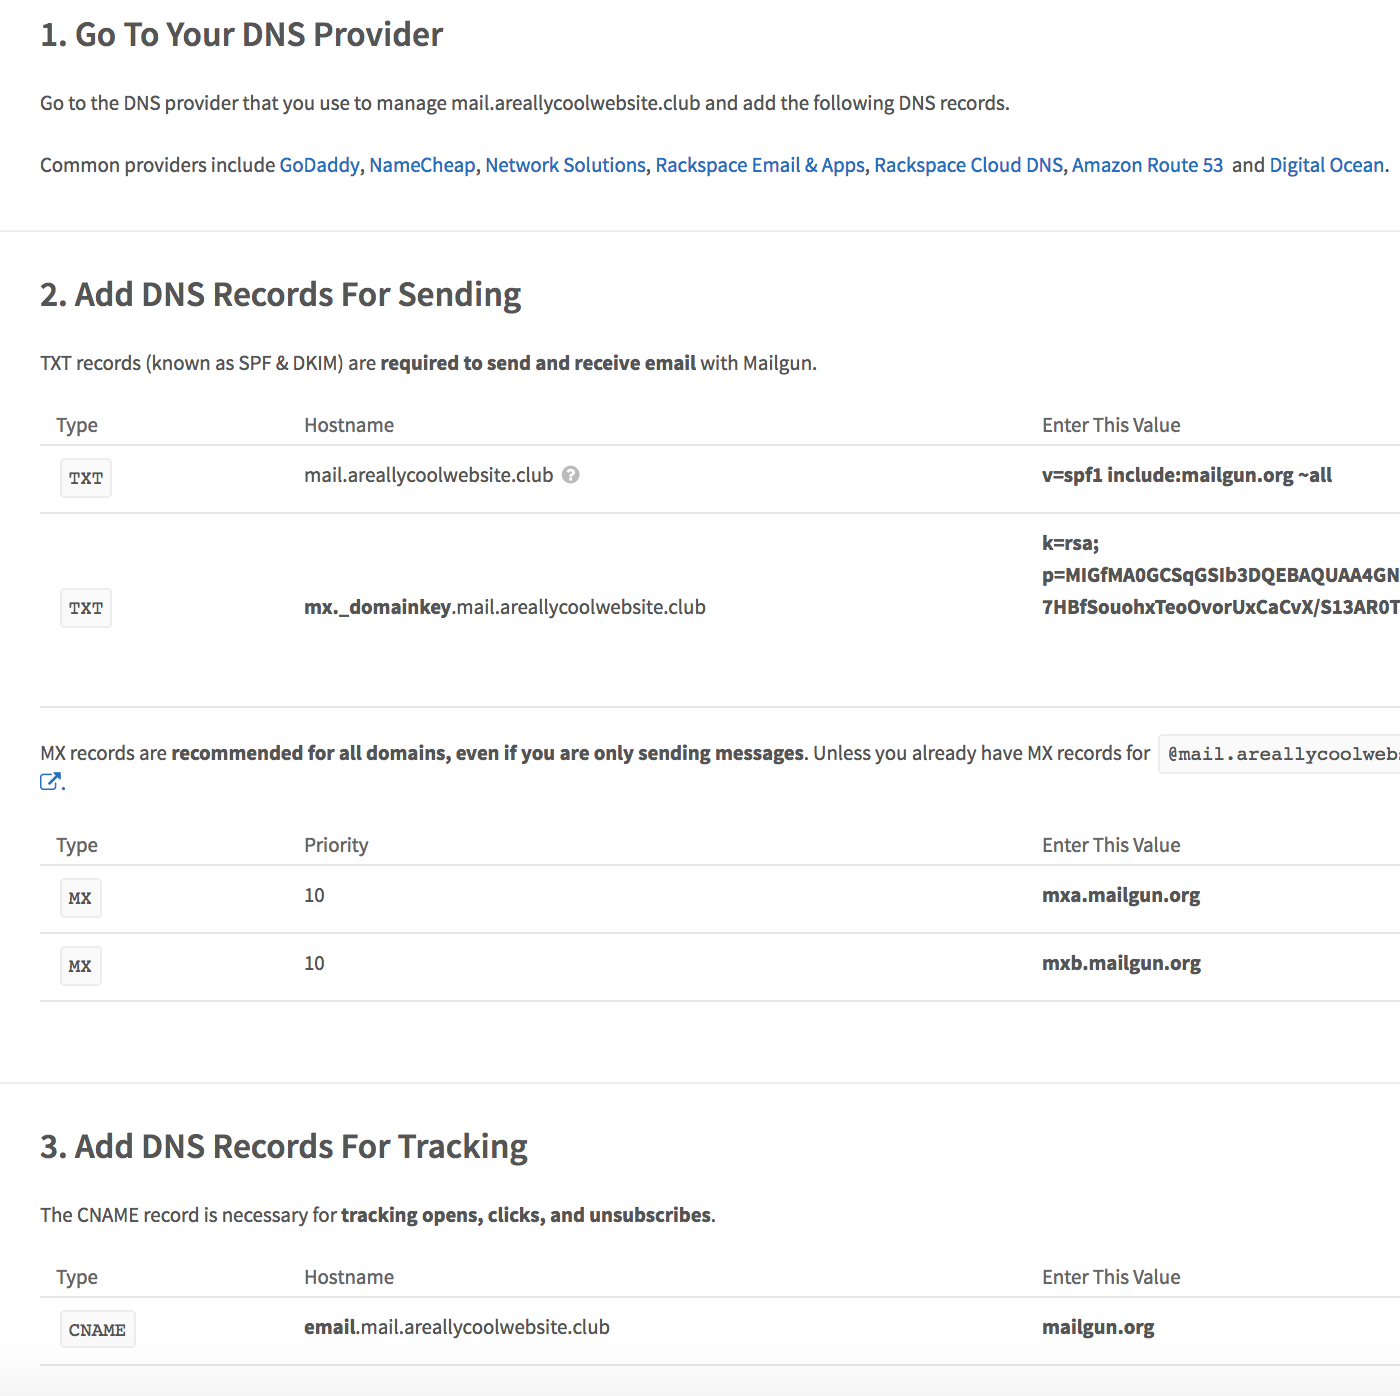
Add & verify DNS records
Now you will need to add the records listed on Mailgun’s configuration page in your DNS provider’s dashboard. You will want to:
Navigate to your Zone Editor page.
Next you will want to click Manage. This is where you cantake Mailguns records and add them to your Zone Editor.

Once your records have been added, you can verify your records have been successfully configured on the Mailgun Domains page. Scroll down and click Domain Verification & DNS to check whether your records were successfully configured (remember: these records can take up to 24 hours to propagate).

Install & activate Mailgun plugin
Log into your website at the /wp-admin path to access the WordPress Admin Dashboard. Navigate to Plugins > Add New and type Mailgun to locate the Mailgun for WordPress plugin.

Once it is installed, activate the plugin on the same screen. Then you can configure Mailgun from the Settings > Mailgun section.
Configure Mailgun plugin
Once you have navigated to the Settings page, you will enter some important settings from the Mailgun portal. Select Yes for the Use HTTP API setting.

Enter the domain you configured for use with Mailgun in the Mailgun Domain Name field. Then enter the API Key from the Mailgun Domains page, and continue to set the rest of your preferences before saving. After saving you will be able to send a test email to ensure your settings were configured properly. If the email is sent successfully, you should receive an email with the following text:
This is a test email generated by the Mailgun WordPress plugin. If you have received this message, the requested test has succeeded. The method used to send this email was: HTTP API.

And that’s it! You’re ready for configuring Mailgun with your WordPress website to send emails to your subscribers and users.