Having your own backups is essential for any website, whether that be on or offsite. Aside from having automated backups, you also need to have an easy way to restore the backup if necessary. This can be done through Reclaim’s Jetbackup software on cPanel. However, in this article, we will show specifically a WordPress plugin that allows you to backup and restore your WordPress site–UpdraftPlus.
Install UpdraftPlus
The first thing you need to do is install and activate the UpdraftPlus plugin.
Where to find in Dashboard
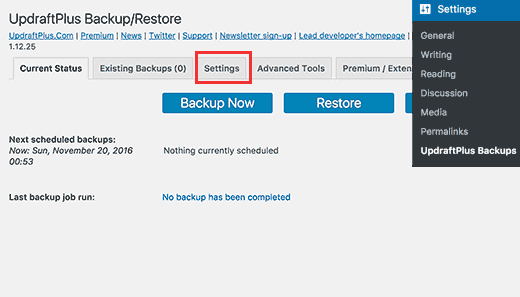
Upon activation, you need to visit Settings » UpdraftPlus Backups page to configure plugin settings.

Automated Backups
Click on the Settings tab.
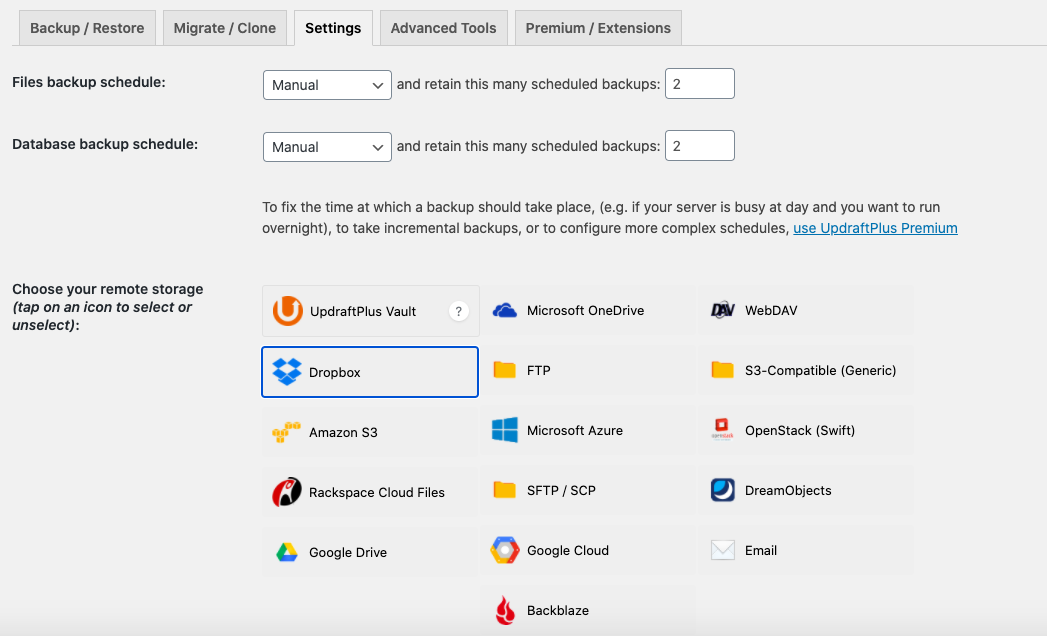
This is where you will set up an automatic backup schedule and a remote location to store your backups.
First, you need to choose a backup schedule for your files, which would include your WordPress themes, plugins, images and other uploads.
After that, you need to select a database backup schedule for your WordPress database. The schedule should follow the frequency that you make changes to your website.
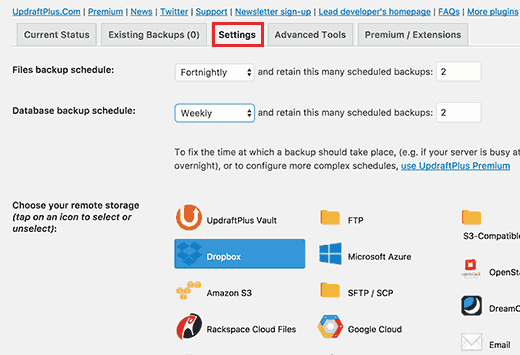
Next, you need to choose where to store your backup files.
UpdraftPlus allows you to save your backups to several cloud storage services including Dropbox, Google Drive, Microsoft OneDrive, any many others. You can also send your backups to an email address. All of these options are shown in the screenshot referenced above, and up to you in how you would like to proceed with setting up your storage location.
Manual Backups
Aside from having your backups being automated on the schedule you create, you also have the option of manually creating a backup.
First you need to visit Settings » UpdraftPlus Backups and click on Backup Now button.
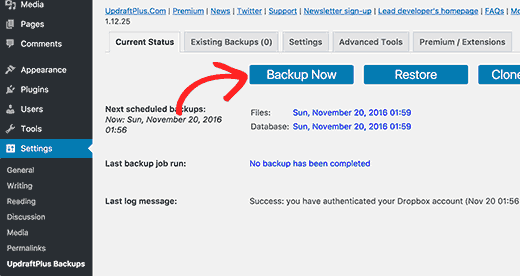
This will bring up a pop-up with options to select files/database backup and whether you want to send the backup to remote storage.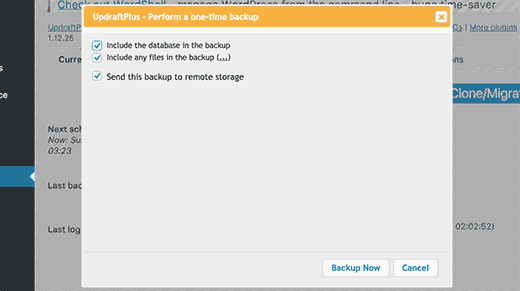
Click on the Backup Now button to continue.
UpdraftPlus will now start creating backup of your files and database, where you also will be able to view its progress on the settings page.
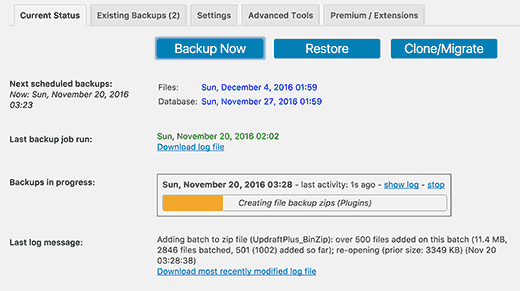
The process may take a while depending on the size of your website, and will also send the files/database to your offsite backup location.
Restoring Your WordPress UpdraftPlus Backup
Creating backups is easy, but the real useful part about backups is the ability to restore them with the same ease.
To do so, you need to visit Settings » UpdraftPlus Backups page and click on the Restore button.
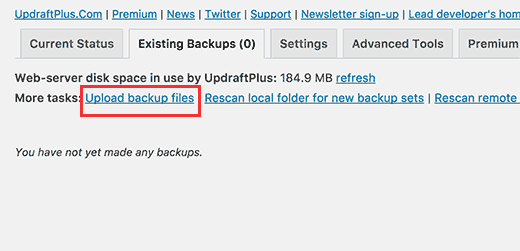
If you have saved backup files on your computer, then you can click on Upload backup files link to manually upload and restore them, shown in the screenshot below:
Click on the Existing Backups tab and click on the Rescan remote storage link.
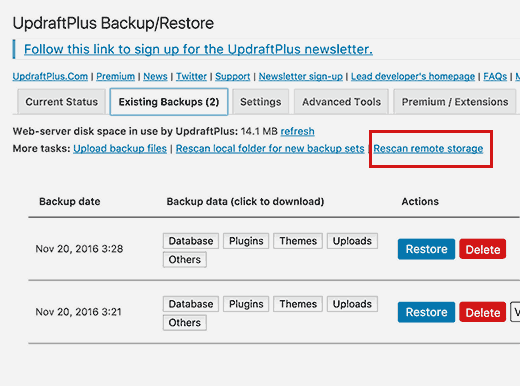
UpdraftPlus will now look for backups in the remote storage location and display them below. At this point, you will want to confirm the backup you are wanting to use, and then UpdraftPlus will ask you what you would like to have restored.
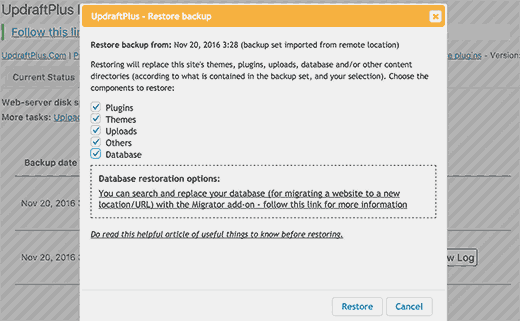
UpdraftPlus will now fetch your backup files from the remote location and start restoring your site from the backup.
Backups are a great way to find that peace of mind when emergencies arise, and we hope that this article made it that much easier to set up the solution you were looking for.
Alternative Storage Locations
Dropbox
I’ve run into a few instances when using UpdraftPlus where the host server I’m migrating from didn’t have enough space to create the backups. Luckily you can connect UpdraftPlus to Dropbox so the files can be sent over there.
This guide will only cover connecting Dropbox to UpdraftPlus. For the full migration guide, please refer to Migrating a WordPress Site Using UpdraftPlus
The first step is to click Settings in UpdraftPlus and then select Dropbox from the remote storage options.
You’ll next be presented with some information about the Dropbox connection letting you know that you’ll need to be logged into the Dropbox account you wish to connect.

Scroll to the bottom of the page and click Save Changes.
The following popup will appear with a link that will authorize access to your Dropbox account.

After clicking the link, you’ll be presented with the following page. Be sure to click the Allow button.

The final page appears in all orange. Click Complete setup to finalize the Dropbox connection.

UpDraftPlus will show a confirmation message that the authentication with your Dropbox account has been successful. The amount of storage available will also be listed.

In Dropbox you’ll now see an UpDraftPlus.com folder under Apps where the backup files will be stored.
