Creating the Environment
The first thing we need to do is create an environment. This will be an Apache server along with a MySQL database. Click New Environment in the upper left of your Reclaim Cloud Dashboard.
![]()
For this guide I’m using the default settings.

Click the Create button once everything is set up as you would like.
Downloading Omeka Classic
The next step is to download the Omeka Classic installation zip from Omeka Classic - Download
Save this file to your computer hard drive.
Deploying the Application
We can now deploy Omeka. Click the > symbol in front of your environment. This will expand the available options.
Under Deployments click the yellow symbol Deploy Archive as shown below.

Select the Omeka zip file from your local computer and click Deploy

After a short amount of time uploading the file, it will now be running under your environment.

Creating the Database
The next step is to create a database and user. Omeka will use this to store the information it needs to function.
You will have an e-mail in your mailbox titled MySQL Node Successfully Added to Your Reclaim Cloud Environment This will provide the necessary information for logging into phpMyAdmin.

Once logged in, click New on the left hand side.

We can now create the database. This can be given any name you wish. For this example I’m using omeka-test_om1 Once you have entered the name to be used, click Create

The database will appear on the left hand side.

Adding a User
Next we need to create a user. Click User accounts along the top of the phpMyAdmin home screen.
Click Add user account

The user name can be whatever you like. I typically prefer to have it the same as the database to keep things simple. Enter a password and re-type it.

All privileges under Data and Structure should be assigned.

At the bottom of the page click Go which will create the database user.

Updating the db.ini file
We now need to transfer the database settings into the Omeka db.ini file. This includes the IP address of the database which can be found when clicking the > symbol in front of SQL Databases in the Dashboard. Please note, your database will have a different IP than the one shown here.

Under Application Servers click on the wrench which is labelled as Config

We can now navigate to /webroot/ROOT by double clicking on each name in the window that opens.

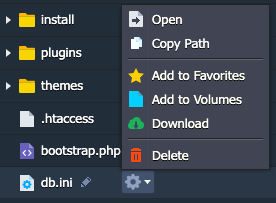
Finally we’ll have access to the db.ini file which can be opened by double clicking on it or by clicking the gear icon and selecting Open from the pop up menu.
The host, username, password and dbname fields need to be updated with the corresponding values. Once this has been done click Save to save the changes.

Opening the URL to our environment will now reveal the Omeka Configuration screen where we can set up the Default Superuser Account.
